Grout is a material that often fills the space between tiles. Some people also call it filler. Usually grout is a mixture of cement, sand, and water. The sand in grout makes it vulnerable to moisture absorption. If not treated properly, grout absorbs moisture. Consequently, it becomes a breeding ground for bacteria and fungi.
In extreme cases, grout starts to deteriorate. This can also cause the tiles to fall of your wall. Sealing the grout is a good solution to avoid all these problems. Often times, the composition of grout is different. If the grout is epoxy-based, then there is no need for sealing as epoxy acts as moisture repellent.
If you are using non-epoxy grout, it is important to seal it. You can choose between penetrating and membrane-forming sealers. You can apply these sealers in 5 easy DIY steps: preparation, coating, waiting, cleaning, and testing.

Two Types of Grout Sealers
Before I tell you how I seal my grout walls, it is important for you to know the different types of sealers. There are two types of grout sealers in terms of their chemical composition as well as utility.
1. Penetrating Grout Sealers.
Penetrating sealers are like vaccines: they mix with grout instead of blood to protect it against moisture, fungi, and bacteria.
Penetrating grout sealers are the most common. These sealers are premixed with water. All you have to do is to apply it in between the spaces formed by the tile joints. This is the [amazon link=”B00IPO6GEM” title=”penetrating sealer”/] that I recommend you to get hold of:
[amazon box=”B00IPO6GEM”]
As the name suggests, penetrating sealers are absorbed by the grout. Once absorbed, the sealer acts as moisture repellent. By keeping the moisture off-limits, penetrating sealer keeps fungi, bacteria, and dirt away from your walls.
You should also know that you do not have to apply these sealers on your tiles. This is because tiles already have a transparent surface that wards off moisture. Applying sealer on tiles would be a complete waste.
2. Membrane-Forming Grout Sealers.
Membrane-forming sealers are like mobile phone casings: they form a shield on grout surface to protect it.
This type of sealer forms a protective membrane on the surface of grout. This membrane than wards off the threat of moisture, bacteria, and fungi.
Membrane forming sealers are often used in moist places like kitchens and bathrooms. Grout present in the bathroom or kitchen tiles is more vulnerable to moisture absorption. And these sealers resist it like battle hardened soldiers. I recommend you get this [amazon link=”B01MQCKIU9″ title=”membrane-forming sealer”/] :
[amazon box=”B01MQCKIU9″]
However, there are few drawbacks to these sealers. Firstly, they are expensive. Secondly, the protective layer also entraps the moisture already present in the grout. When pre-sealed moisture stays in grout, it causes mildew which looks ugly on any wall.
WARNING
Apply sealer on tile surface only if your tiles are unglazed i.e. if they lack a shiny surface.
I would suggest using these sealers only in areas where there is high moisture i.e. kitchen or bathroom. Moreover, you can also apply them on the surface of non-glazed tiles. This will protect the tiles as well. Keep in mind that if your tiles are glazed, then you will only be wasting your sealer if you apply it on the tile surface.
5 Easy DIY-Steps to Seal the Grout
Now that we know different types of sealers and where to use them, let me tell you 5 easy steps through which I seal my grout easily at home.
1. Prepare Your Walls and Space.
First thing first, you need to prepare. In the preparation phase, you need to make sure that your room is empty. Trust me, you simply won’t like applying sealer on anything other than the grout.
Also, if you are sealing fresh grout, please make sure it has been given ample time to set. If you apply sealer too early, you may have to replace your tiles.
PRO TIP
If you are applying sealer on fresh grout, please let it set for at least 24 hours.
And if you are applying sealer on an older grout, make sure you clean the surface with a dry cloth. This will help the sealer to make a perfect chemical reaction with the older grout.
PRO TIP
If you are applying sealer on older grout, clean it with a dry cloth first!
2. Apply the Coating.
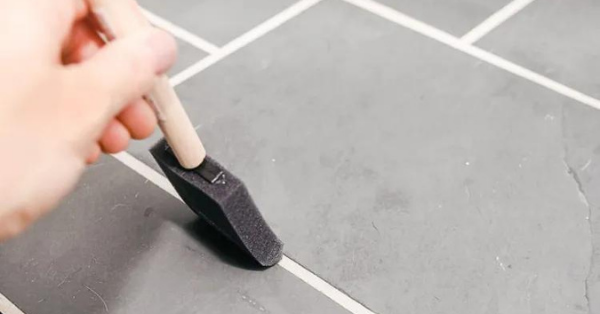
Once the preparation phase is done, it’s time to put sealer on the grout. You can use a brush or a roller to do this. Personally, I prefer brush to rollers or pressure sprays simply because it’s less messy. If you don’t have a brush, [amazon link=”B07YXFGYGH” title=”here”/]: is where you can get all the tools you may need for grout sealing:
[amazon box=”B07YXFGYGH”]
While coating is easy, it is a lot of hard work. If you have small tiles, please know that this increases the workload significantly. So, be patient with the process. Also, being systematic will save you a lot of time.
Start from one corner and end at the other. This way, if you have to recoat, you won’t have to wait for the first coat to set. The side from where you started would already be dried once you will get there again.
PRO TIP
I prefer giving at least two coats to the grout for better results.
I would highly recommend giving your grout at least two sealer coats. This will minimize the risk of leaving any space unsealed. Also, you must not overdo sealing. Two coats are just about perfect. Stick with it.

3. Wait for the Grout Sealer to Set.
Once you are done with the last coat, give the sealer about 30 minutes to set. This time around you must be patient. You are no longer adding another coat to the grout. And you need to give the last one at least 30 minutes too.
PRO TIP
Putting back the stuff you have taken out of your room during this wait time would be a great idea.
4. Clean the Tiles
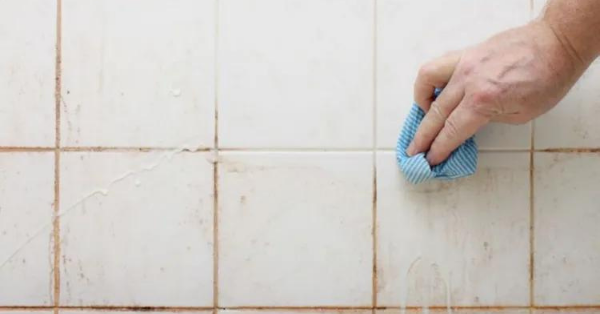
Once you are done waiting the suggested time, it is time to clean the tiles. While sealing, it is highly likely that you will unintentionally apply some sealer on your tiles.
If you are using membrane sealers and you have put them on glazed ceramic tiles, they will lose their original shine and color. So, you better clean them.
PRO TIP
Silk cloth works the best for cleaning the tile surface. Spill some lemon juice on cloth if you have waited more than an hour for cleaning.
However, if you have intentionally put sealer on the surface of unglazed tiles, you can skip this recommendation.
PRO TIP
If you have not applied sealer on tile surface, you have to clean the tiles for any unintentional sealer marks.

5. Test If the Sealer Works.
Once you are done cleaning, give the sealer some rest. Allow it to set for 24 to 72 hours. The time really depends on the air flow around your walls. If the airflow is ample, 24 hours are enough. Otherwise, wait a bit longer.
Now is the time to test. You want to know if your sealer works or not. To check that, sprinkle a few drops of water on the grout. If the water comes on the surface of grout, viola! You are good to go. I personally perform this test on three different locations to confirm a job well done.
PRO TIP
I prefer sealing grout at least once a year.
Conclusion
Sealing grout is very important. It keeps moisture, bacteria, and fungi away from your walls. This not only keeps your walls sound, but it also makes them look good.
Sealers are of two types mainly. You can choose one according to your needs. By using 5 easy steps, anyone can apply these sealers. For best results, make sure you prepare beforehand, coat the sealer well, wait patiently, clean gently, and test meticulously. Want to know how to seal floors? Check this post about concrete floor sealers:
3 Types of Concrete Sealers. Want to Know Which Is the Best?
Concrete sealers give life and shine to your floor. But have you ever got confused in picking one for your floor? If you did, I will help you in knowing the differences between concrete sealer variants.

