Hardwood flooring has been around for many years now. If you are reading this, you may also have hardwood floors. Over time, these floors can get dirty due to spillage and dirt accumulation. If you are not a regular caretaker of your hardwood floor, then these floors can look very ugly.
If you have missed regular cleaning and now your floor is looking dirty, there is still a lot that you can do. In fact, you can almost restore your floor to original condition. The cleaning process is very easy. However, it can take some time and hard work to clean all those stains that have accumulated over years.
There are both natural and synthetic hardwood cleaners that you can you use to clean your floor. You can do it yourself at home by following these 5 easy steps: procuring, preparing, applying, inspecting, and reapplying.

Two Types of Hardwood Cleaners
It is important to know different cleaners that are available before listing the steps you can perform to clean your floor. This will give you a clear idea of what materials you are looking for depending upon the condition of your floor and your personal preference.
1. Natural Cleaners
Natural hardwood cleaners are your household items. Chemically, they are less toxic and perform well on floors that do not have stubborn stains.
You can use a variety of household items to clean your old and dirty hardwood floor. These regular household items are conventionally used for removing stains from different materials. Some common household materials that you can use to clean your hardwood floor are:
- Vinegar
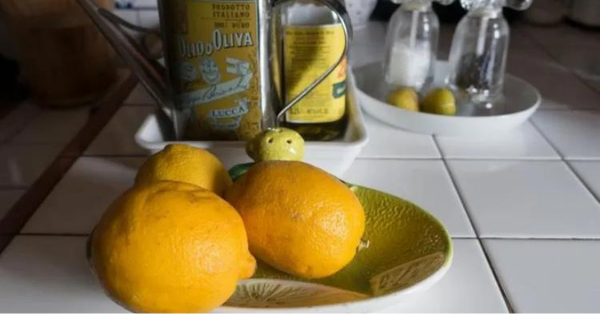
- Lemon Juice
- Baking Soda
- Olive Oil
If you do not have these materials or you do not want to get into the hassle of preparing them for cleaning hardwood, [amazon link=”B002AFK8QY” title=”here”/] is where you can get ready-made natural cleaner:
[amazon box=”B002AFK8QY”]
There are certain upsides to these natural cleaners. They do not react chemically with the wood of your floor. They only target the stains and dirt and take them off. This keeps your wood in natural shape and color. Moreover, these cleaners are not toxic at all for you while you are applying them.
However, these cleaners are not as effective as many industrial cleaners. They would require a lot of hard work to take stubborn stains out. Moreover, they will not give a shine to your floor. Generally, these materials serve the needs of cleaning only when your floor is not very dirty and has little stains.

2. Industrial Hardwood Cleaners
Oil-based polyurethane is relatively cheaper and durable. However, it can tarnish the original look of your floor apart from making it difficult to clean
Industrial cleaners are ready-made cleaning solutions. They are available off-the-shelf. You can use them to clean you floors that have accumulated dirt and stains over years. These are very potent chemicals that react with the dirt on your hardwood and take it out effectively.
There are some industrial cleaners with additional lustering components. They will give your floor a nice shine once you are done cleaning it. On the flip side, these cleaners are expensive than household cleaners. Moreover, they are also toxic, and you may want to put a face mask while applying them.
If you want good industrial hardwood cleaner, [amazon link=”B000ARPVIY” title=”here”/] is where you can get one that I like the most:
[amazon box=”B000ARPVIY”]
5 Easy Steps to Clean Hardwood Floors
Now that you know the different options you have to use for cleaning your hardwood floor, it is time to pick one and get started. I will tell you 5 easy steps that I follow to clean my dirty hardwood floors. Follow them and clean your floor like new!
1. Procuring
PRO TIP
Get everything you need from one place. You will get value for your money and will cut down a lot of hassle.
Once you have selected the type of cleaner that best fits your needs, make sure you have it. If you do not have it, use the links above to get hold of it.
Apart from getting cleaners, you also have to make sure you have all the tools you need to clean your floor. You will need a mop and microfiber mop pads. Here is where you can get everything (best industrial cleaner, mop, and mop pads) at a best price:
rt from getting cleaners, you also have to make sure you have all the tools you need to clean your floor. You will need a mop and microfiber mop pads. [amazon link=”B0746WTZ2T” title=”Here”/] is where you can get everything (best industrial cleaner, mop, and mop pads) at a best price:
[amazon box=”B0746WTZ2T”]
2. Preparation
Once you have everything with you, it is time to prepare your floor for cleaning. You have to make sure your floor is empty. Do not be lazy. Take everything out to make sure every part of your floor gets the necessary treatment. Once you have taken everything out, do not forget to vacuum clean your floor to take all the dust away.
Apart from emptying your room, you also have to prepare natural cleaners (in case you are using them). If you want to use lemon juice, make your cleaning solution by putting a cup of lemon juice into half bucket of warm water. If you are using vinegar or olive oil, put half a cup into half bucket of warm water. If you are using baking soda, put three tablespoons into half bucket of warm water to prepare your solution.
PRO TIP
Do not be lazy when it comes to emptying the room. Take everything out for a thorough cleaning process.
3. Applying
Once you are done preparing, it is time to apply the cleaning solution. Dip your mop pad in the solution and start applying it on the floor. Make sure you put pressure and rub the mop good at spots where there are hardened stains. Start from one corner of the floor and come back at that spot to make sure every part of the floor has been taken care of.
PRO TIP
Start from one side of the floor and reach it back to make sure every part of the floor gets the treatment.
4. Inspection
Once you have applied the cleaning solution using a microfiber mop, let the floor dry. Turn on the fan and open windows to speed up the process. Once the floor is dry, look out for spots of stains that were previously there. If they are gone you have done it! If they are still there, you still have one more step to go.
PRO TIP
Save your time by inspecting only those areas where there were stains previously.
5. Reapplying
You have to reapply the cleaning solution to the areas where stains are still there. If a lot of stains are still there, it is better that you redo the whole floor. If only a few spots are left, just focus on those areas.
PRO TIP
If a lot of stains are still there, it is better to redo the applying process for complete floor.
Conclusion
There you go! You have done it. You have just cleaned your hardwood floor by using 5 simple steps: procuring, preparing, applying, inspecting, and reapplying.
Want to know how to apply polyurethane on wooden flooring to protect it more? Check this out:
6 Easy Steps to Apply Polyurethane to Wood Flooring
Wooden flooring is delicate. Learn how to protect it by applying polyurethane coating in 6 easy DIY steps.

