I decided to cover the floor in my entryway with carpet tile. I am so glad, that I’ve made this investment. It looks great. You may have many reasons to install carpet tiles in your house or yard area. I am ready to share with you 7 easy steps to install the carpet pile.
Carpet pile installation is not a hard process. You can do it yourself, following our simple instructions. First of all, you need to prepare the floor for installation. Then you should mark the center of the room. After that, you have to foam your squares and lay the carpet tiles. Read further to know the other 3 steps to install the carpet tiles. Besides, you’ll know the carpet tile structure and adhesive you should use for it.
What is Carpet Tile?

Carpet tile is the type of flooring. The carpet tile is the same as carpeting, but it is made not in the form of one big piece of fabric, but as separate square blocks.
The carpet tile is not big. It is a square with a side of 0.5 meters on average. In fact, carpet tiles can be of different sizes. Many readers wrote me, that they like carpet tiles more than carpeting because of several reasons:
- You shouldn’t cut it while installing
- With carpet tiles, it is easier to cover the room of irregular shape
- It is possible to create various patterns, choosing the tiles of the same material, but of different colors
- Carpet tiles can cover both, the whole perimeter of the room as well as separate parts of it
Before you make the final decision, on whether you need carpet tiles for your entry area or kitchen, I advise you to study this product carefully. To help you, I want to tell you about the structure of a carpet tile.
Carpet Tile Structure
Each carpet tile consists of 2 layers:
1. Carpet pile
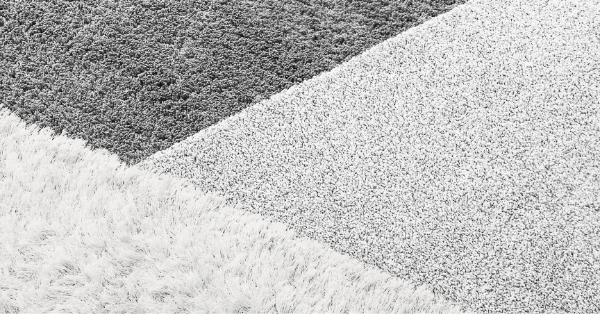
The tiles can be made of different carpet fabrics. Just like regular carpets or rugs, they can be of wool, cotton, olefin, etc. But there are three most widespread kinds of carpet tile fabric:
Nylon
Nylon carpet tile is quite stiff. It is very strong and durable. You can put nylon carpet tiles in the areas with high traffic, like entryways, hallways, mudrooms, kitchens, etc. Nylon carpet tiles can withstand high moisture levels, high temperatures, and the heavy weight of the furniture on them. But nylon tiles have some solid drawbacks. They are quite costly.
Polyethylene
Probably, polyethylene carpet tiles are the most popular choice of American homeowners. They are used for kitchens, bathrooms, and even yard areas. The main advantage of polyethylene carpet piles on tiles is the wide choice of colors. Polyethylene is softer than nylon. It feels better under the feet. Besides, it costs less.
Olefin
Olefin carpet tile costs less than the previous too, but it’s also the least durable. It cannot withstand high temperatures. Besides, the pile can crush under goers’ feet. That’s why it is not suitable for high-traffic areas.
2. Hard padding
Carpet tile has not just the first layer, which anybody can see, but also the padding. The padding makes the carpet tile more durable. It also helps to fix it well and prevents sliding. The high-quality padding makes the carpet tile more durable. As usual, carpet tiles’ padding is made of these materials:
- Bitumen
- Resin
- Polyurethane foam
- Polyvinyl chloride
Due to the high-quality coating, the carpet tiles are more elastic and strong. It makes the tile not so slipping. It reduces noise, prevents the tile from deformation, and makes stacking between different carpet squares less noticeable. The great news – you don’t need to install some extra padding under the carpet tile. Everything has already been done for you.
Watch the video to know even more about the carpet tiles and the way to install them.
I hope, the information above will help you to choose the right carpet tiles for your space in the house or the yard. Let’s imagine that you’ve already got carpet tiles and now you are ready to install them. What instruments do you need for that?
Tools and Materials Needed for Carpet Tile Installation
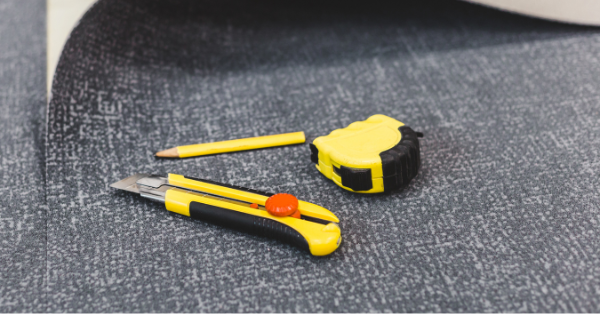
Below is a list of all the tools and materials needed for a carpet tile installation. Most of them are primary tools that are readily available to you and the rest can be rented from any home center around you.
– Carpet tile
– Measuring tape
– Floor scraper
– Adhesive carpet tape or sticker tab
– Chalk line
– T-square
Carpet Tiles Installation Step by Step Guide
Installing carpet tiles is not just easy but also a simple way to add patterns and a mix of colors to a room. These patterns can be customized to match the décor in any home following these easy steps.
Step 1: Prepare the Floor
Move out every piece of furniture if the room isn’t already empty then clean the floor of any debris. If there is any touch residue attached firmly to the floor, scrape it off to ensure that the floor is clean before laying your carpet tiles.
Step 2: Mark the Center of the Room
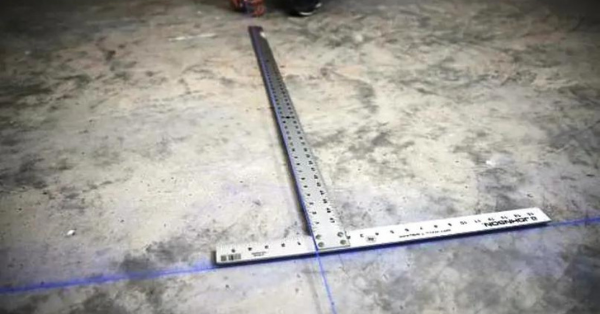
Using a measuring tape, measure and mark the center points of the walls of your room and connect the marks on opposite walls to form a crosshair at the center of the room using the chalk line.
PRO-TIP
FROM THE CENTER
The installation of carpet tiles should always begin from the center of the room and then be worked to the edges of the room.
Step 3: Form your squares
Check to make sure that the lines are at a right angle from one another using your t-square. If they do not form a perfect square, you can move the lines to make the needed corrections. A 3-4-5 triangle can also be used to check the squares.
When you measure 3 feet on one line at the intersection point and measure 4 feet on the other line, both marked points should be exactly 5 feet apart for it to be regarded as a square.
If the lines do not meet at perfect squares, there will be irregularities in laying your carpet tiles.
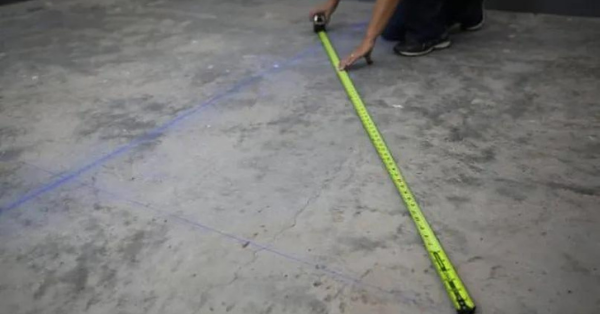
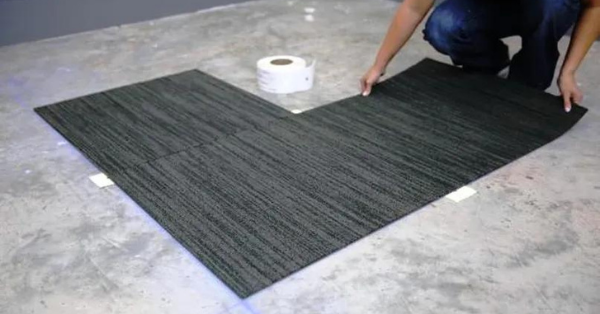
Step 4: Do a Sample Layout
If you have carpet tiles of different colors and intend to make a pattern from them, now is the time to decide on your pattern. Mix the tiles of different colors to get a good differentiation during installation.
For edge tile sizing, do a simple layout ensuring that the tiles touching the wall are not less than a half tile wide. If the tiles touching the wall won’t be up to a half tile in size, you can split the reference line by shifting the center tile.
To have a perfect carpet tile installation, the tiles touching the walls in opposite directions should be of the same width.
Step 5: Check for the Carpet Pile Direction
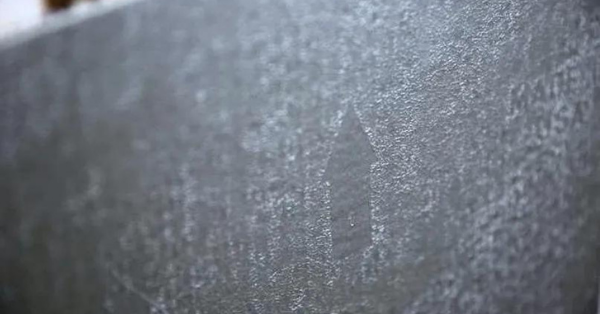
When you make a mistake by placing carpet tiles in different directions, your carpet tiles may end up looking slightly different. Check for an arrow at the backside of your carpet tile to find the direction of the pile.
This should be used for your layout direction to have a consistent orientation during installation.
Step 6: Lay the Carpet Tiles
Whether you have sticker tabs or double-sided adhesive tape, any of them will do just fine.
Place the sticker tab or tape on the corner of the tiles. One sticker tab is expected to bond four tiles together with your reference line as a guide and the edge of each tile takes up a quarter of the sticker tab.
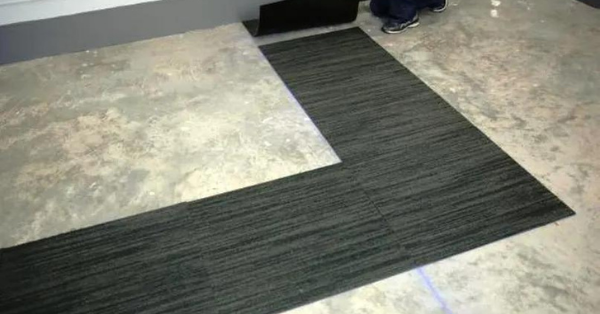
Continue your installation in your chosen pattern and ensure that the carpet tiles are placed closely together and pressed firmly to the ground.
What Adhesive Do You Use for Carpet Tiles?
As usual, the adhesive is not required for carpet tiles installation. Nevertheless, it is recommended to put the tiles on the glue in high traffic or too wet areas, like entryways, kitchens, and bathrooms. Very often carpet tiles are used releasable adhesive, which looks like PVA glue. Its main advantage is that keeps the carpet tile firmly but still allows it to be pulled up easily. So, if one of the tiles will wear out, you still can easily replace it.
Step 7: Trim the Tiles at the Wall
Most times, the perimeter tiles next to the wall are shorter than the original tile size. This is not necessarily an installation error. You may need the cut the tile so that it can fit into the space.
Measure the wall to the tile closest to the wall. If the room is a square, then it will be the same direction for the rest but if not, take an individual measurement for other corners too
Flip the carpet tile over and transfer the measurement to the back of the tile marking it with a line. Place your t-square on the tile and cut along the line with a utility knife.
After cutting, place each tile in its spot and repeat for the rest of the open spaces until you have completed laying the carpet tiles for the entire room.
Conclusion
To conclude, you’ve learned how to install carpet piles. Besides, we’ve discussed what carpet tile is and what structure it has. As you’ve seen, installing carpet tiles is extremely simple. Almost anyone can do it and it’s very satisfying when you do it yourself for the first time.
If, however, you don’t want to DIY and would rather hire a professional, that’s fine! But make sure that you hire a decent professional. And by decent, I mean someone who is going to do a good job and not rip you off at the same time. We wrote a post on How to Find the Best Carpet Installers in your Area. Be sure to check it out!
